A Scoundrel's Guide to Blaster Upgrades in Star Wars Outlaws
Master Star Wars Outlaws blaster upgrades: swap plasma, ion, and power modules to dominate droids, shields, and armor in tactical combat.
As I stepped into the scuffed boots of Kay Vess, a cunning scoundrel navigating the Outer Rim in 2026, I quickly realized that in Star Wars Outlaws, wits and words only get you so far. Sure, I could talk my way out of a sticky situation with a Pyke syndicate boss or sneak past an Imperial checkpoint, but when things went sideways—and they always did—there was one constant companion I could rely on: my blaster. And what a blaster it turned out to be.
At the start, Kay’s blaster is a basic plasma spitter, effective enough against common thugs but laughably inadequate against droids, shielded enemies, or anything packing serious armor. I remember staring down my first droideka, squeezing the trigger, and watching my red bolts just sizzle uselessly against its energy shield. That’s when I realized: this little sidearm had hidden depths, and if I wanted to survive the galaxy’s underworld, I’d have to unlock them. The good news? Upgrading Kay’s blaster is not just rewarding—it’s essential, turning a humble blaster into a Swiss Army knife of destruction.
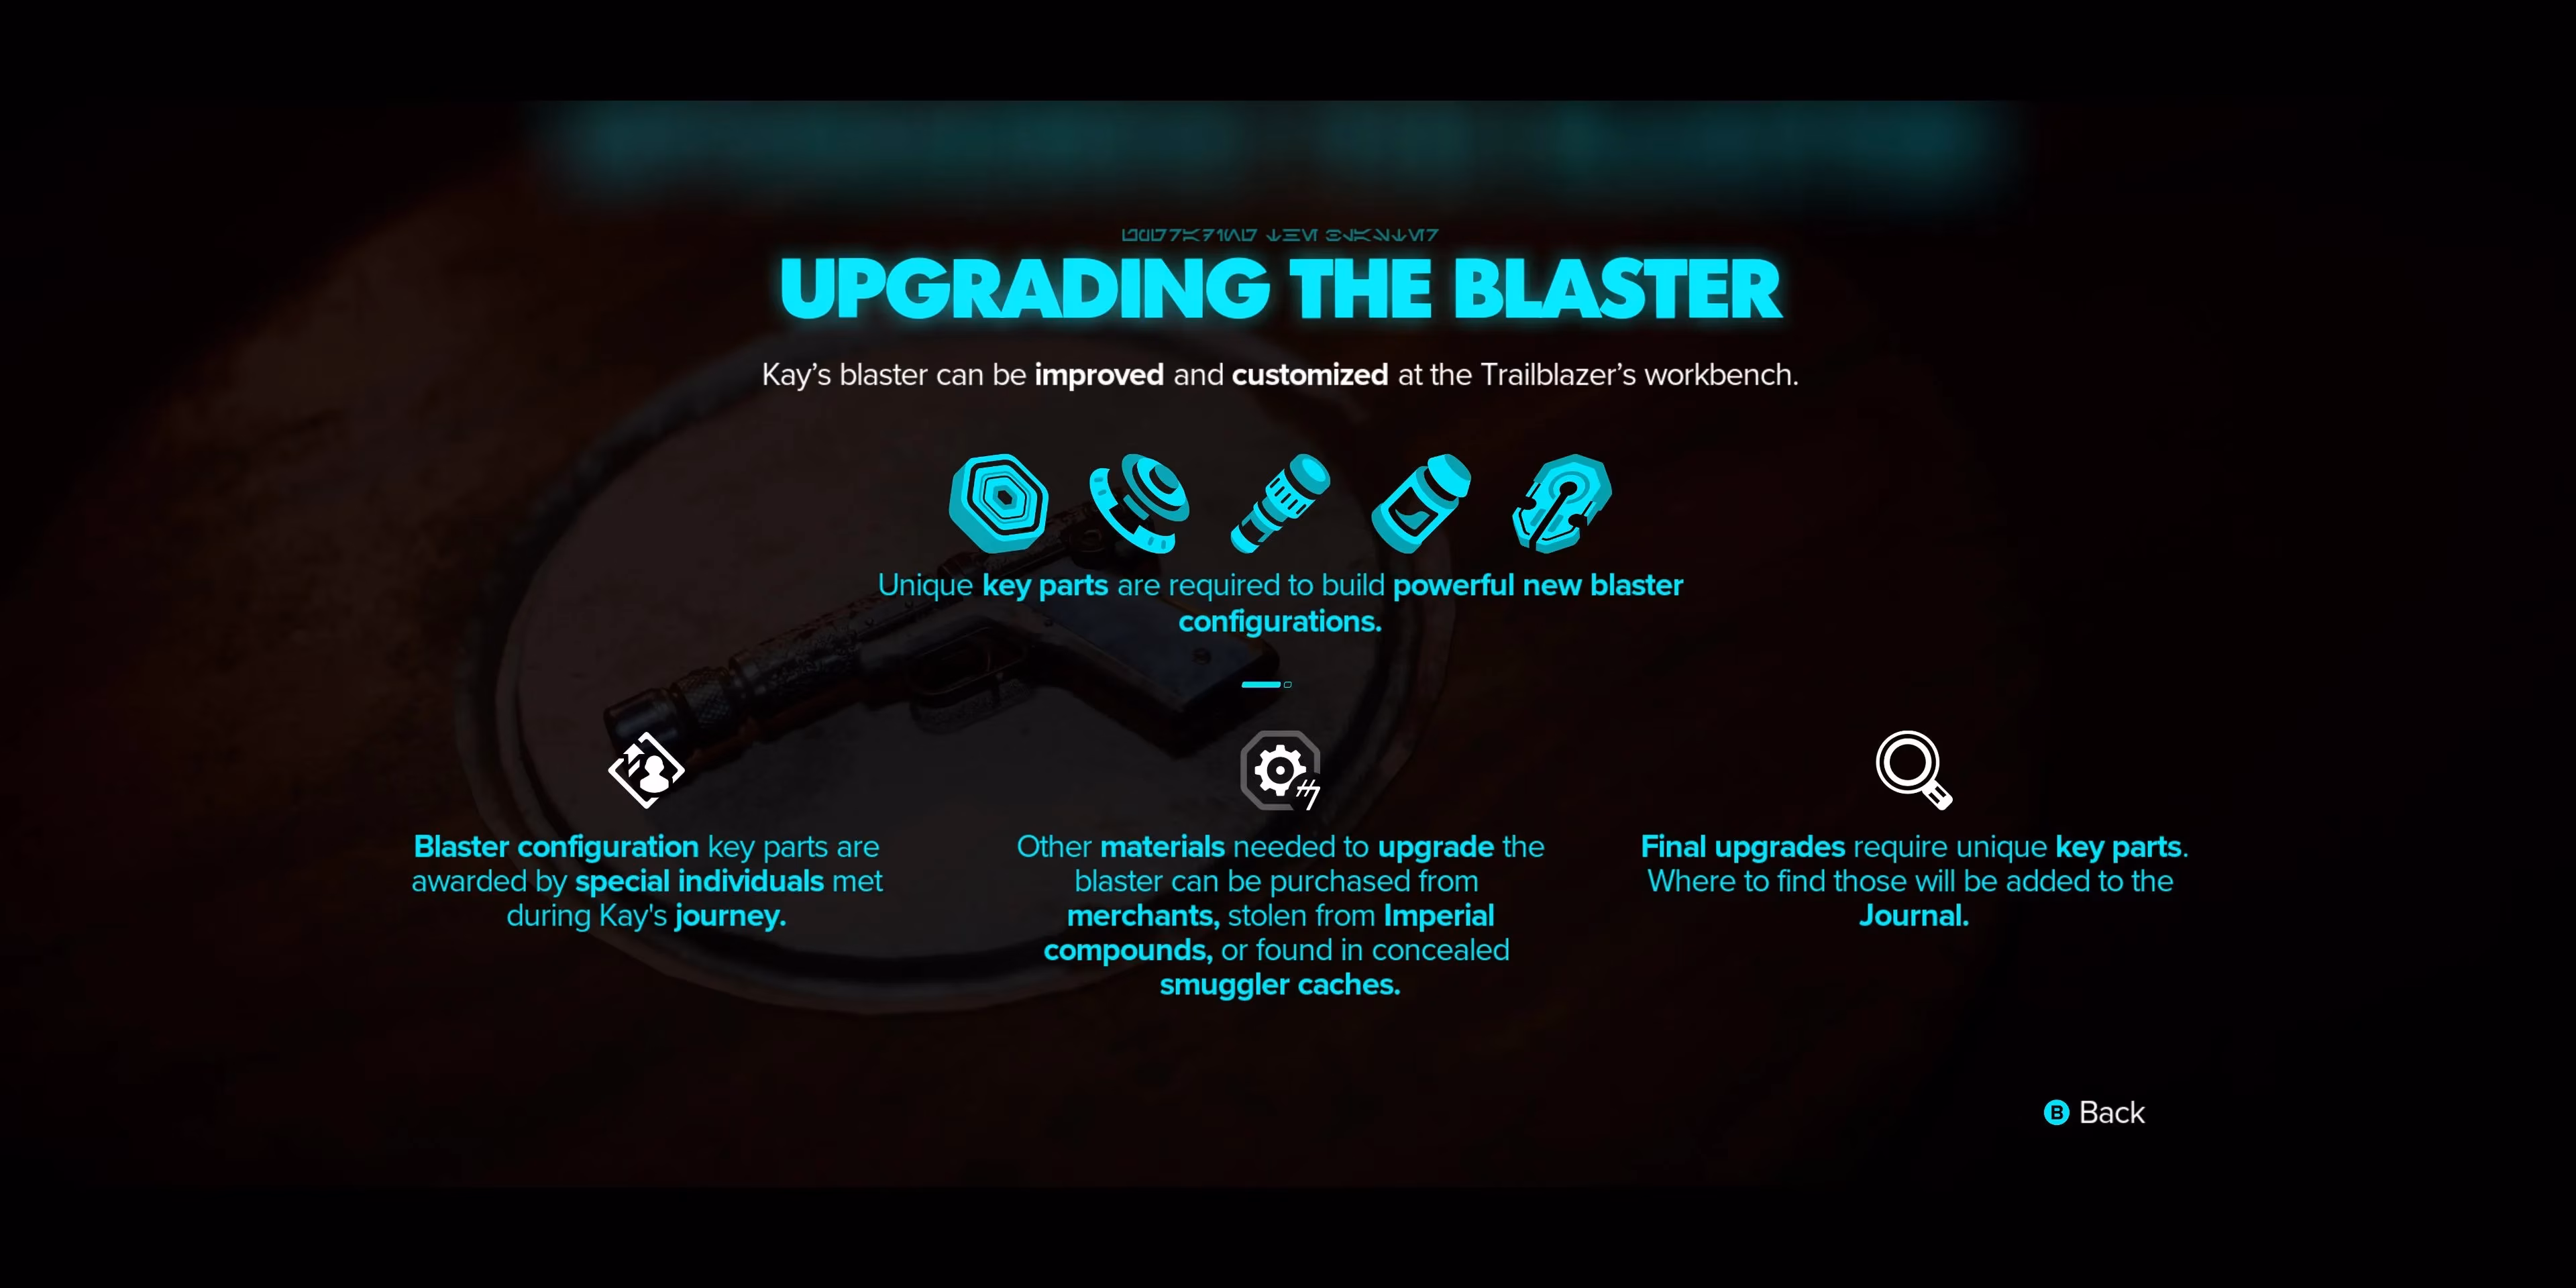
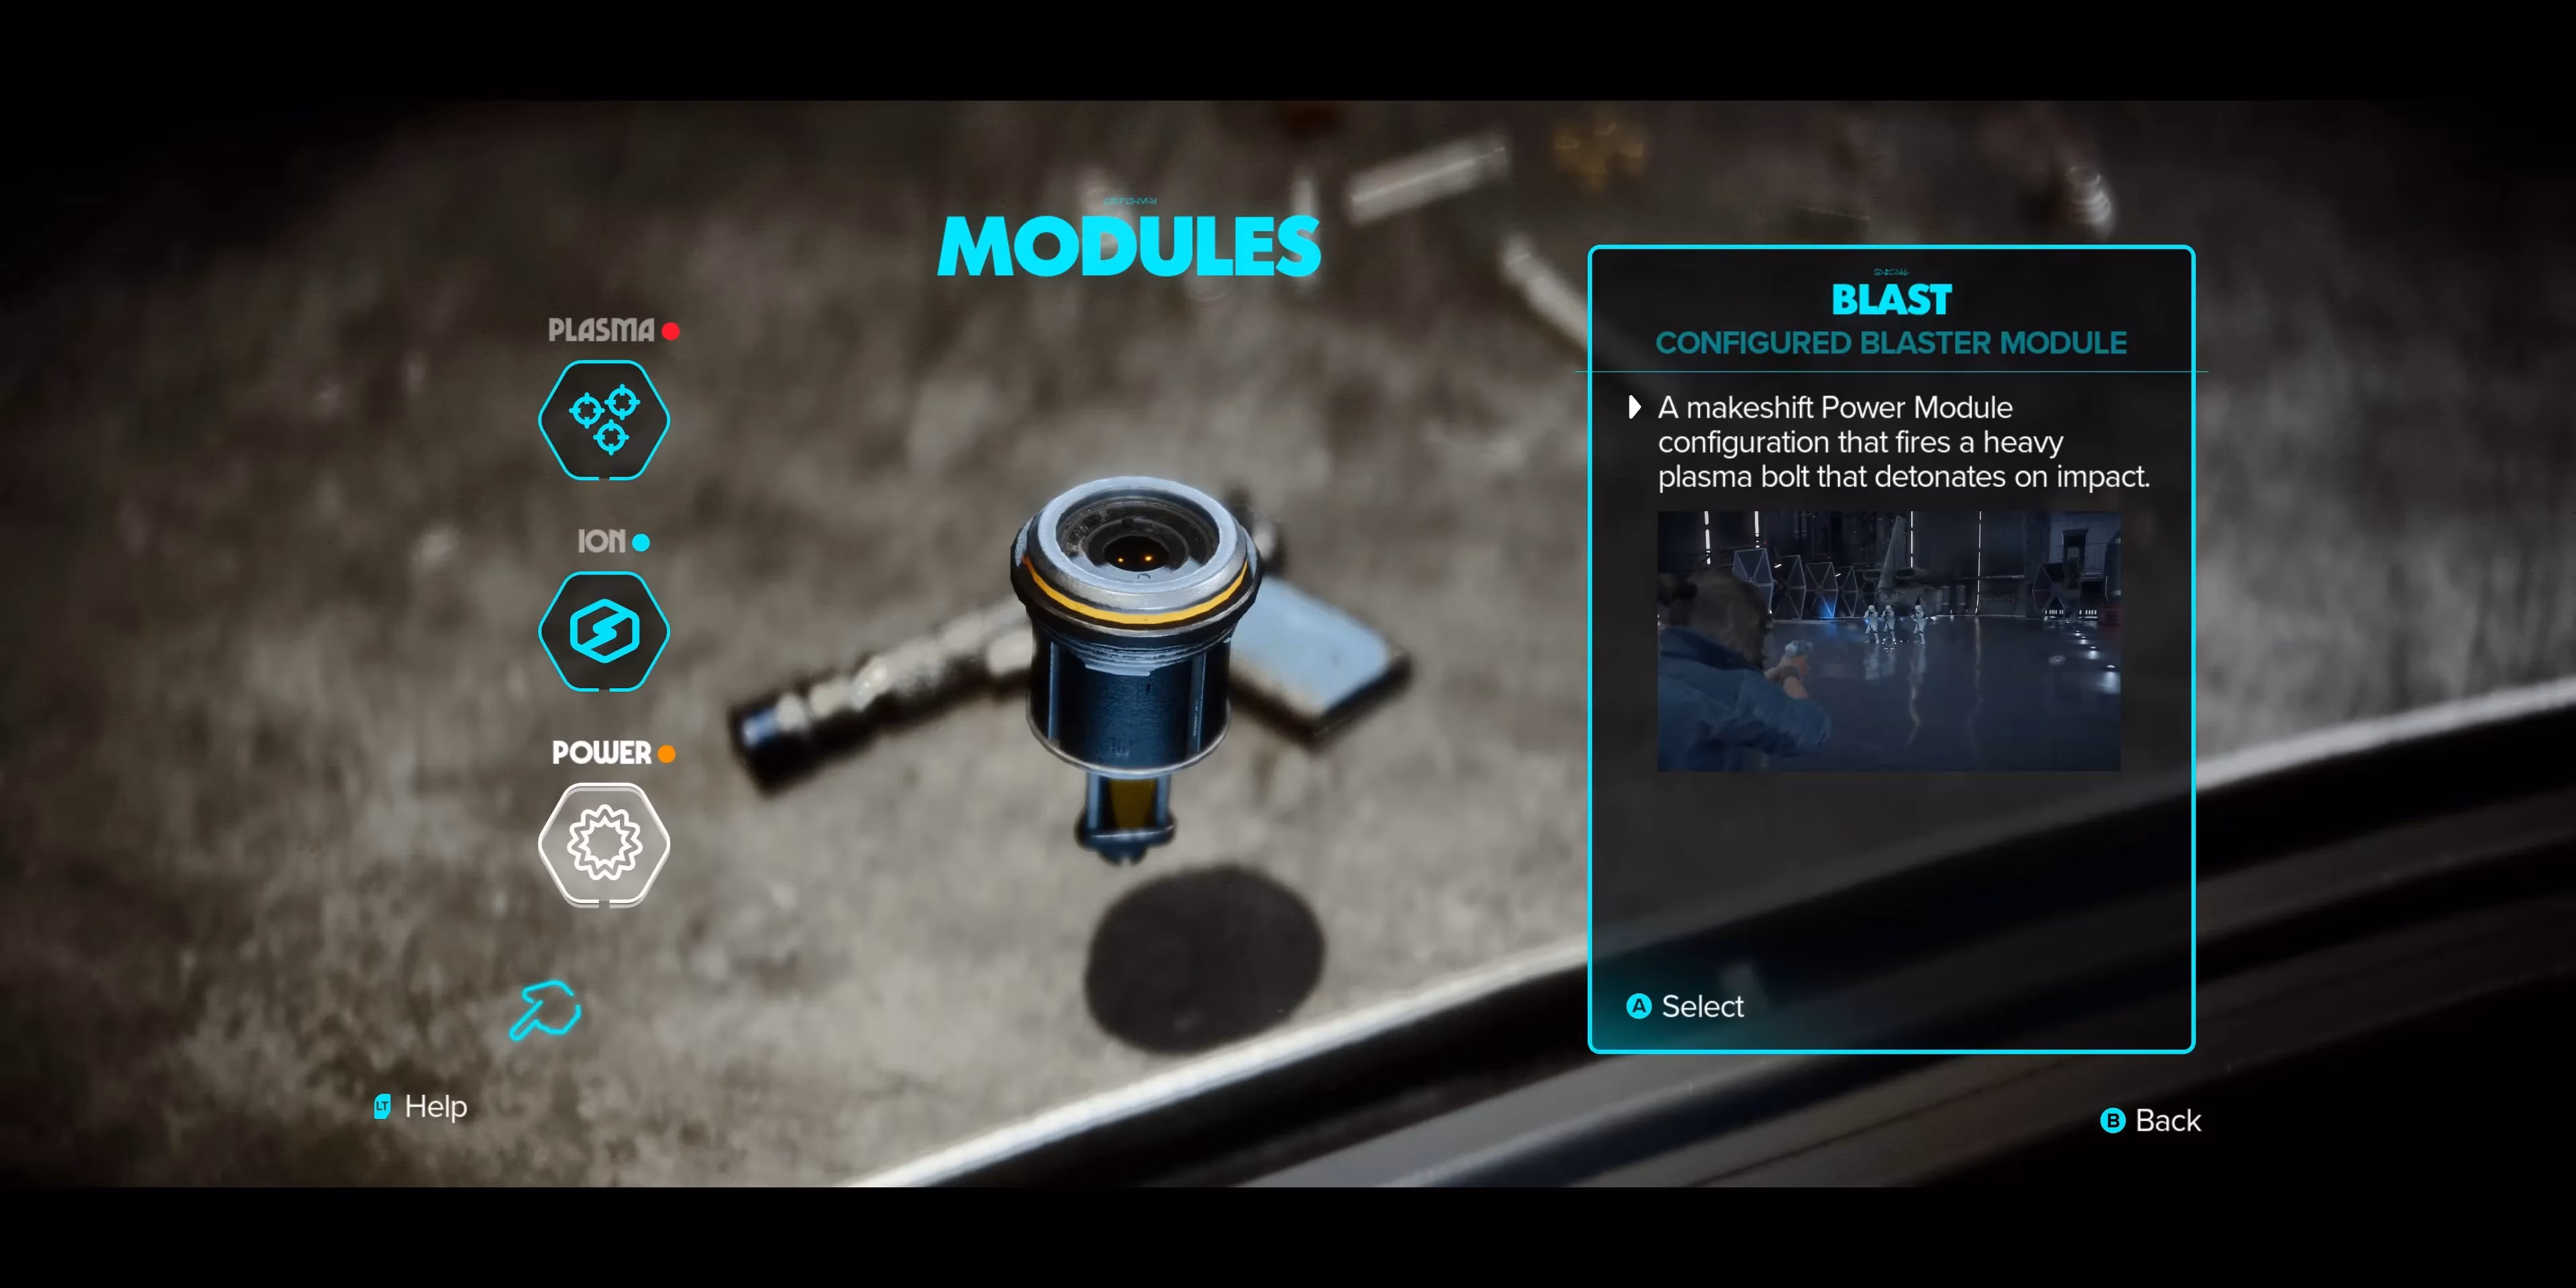
The first step on my upgrade journey arrived after I completed the “False Flag” main story quest. Before that, the workbench on the Trailblazer, our trusty ship, was just a dusty prop. Suddenly, it lit up, humming with possibility. Visiting that workbench became a ritual: I’d return from a heist or a shootout, dump my gathered loot on the floor, and start tinkering. The interface is intuitive—split into three distinct modules: Plasma, Ion, and Power—each with two or three configurations. The main story progression automatically unlocks the recipes for all configurations except one: the Heavy configuration for the Plasma module. That beast is tied to an expert, a specialist contact you meet later in the game, and let me tell you, the quest to gain their trust is a tale in itself. But more on that later.
Why does every blaster upgrade matter? Because the galaxy throws wildly different threats at you, and you can’t just burn through them all with raw plasma damage. Crimson Dawn enforcers? They crumple under a well-placed Ion blast that fries their shields. Imperial scout troopers? A charged Power shot will punch right through their armor. And those pesky environmental puzzles where you need to overload a door panel or explode a power coupling? That’s where the Ion module shines again. I found myself constantly swapping configurations mid-fight, which added a delicious tactical layer. Did I sometimes forget to switch and waste precious seconds? Absolutely. But when I got it right, I felt like a true outlaw legend.
Now, the real grind isn’t unlocking the configurations—it’s gathering the materials. The majority of components you need can be found scattered across planets, stuffed in crates, or pilfered from fallen enemies. I became a compulsive looter during my playthrough, checking every corner of a crime lord’s den for that one rare Conductive Fluxcapacitor. But it’s not always random looting. Some materials are locked behind faction reputation. Syndicate-affiliated merchants keep exclusive stock behind the counter, and they’ll only do business with you if your standing with their faction is good or excellent. I remember grinding Hutt Cartel missions for an entire evening just to get my hands on a few Power Prisms. Was it tedious? A bit. But also oddly immersive—I was building my reputation in the underworld, and the blaster upgrades were the tangible proof.
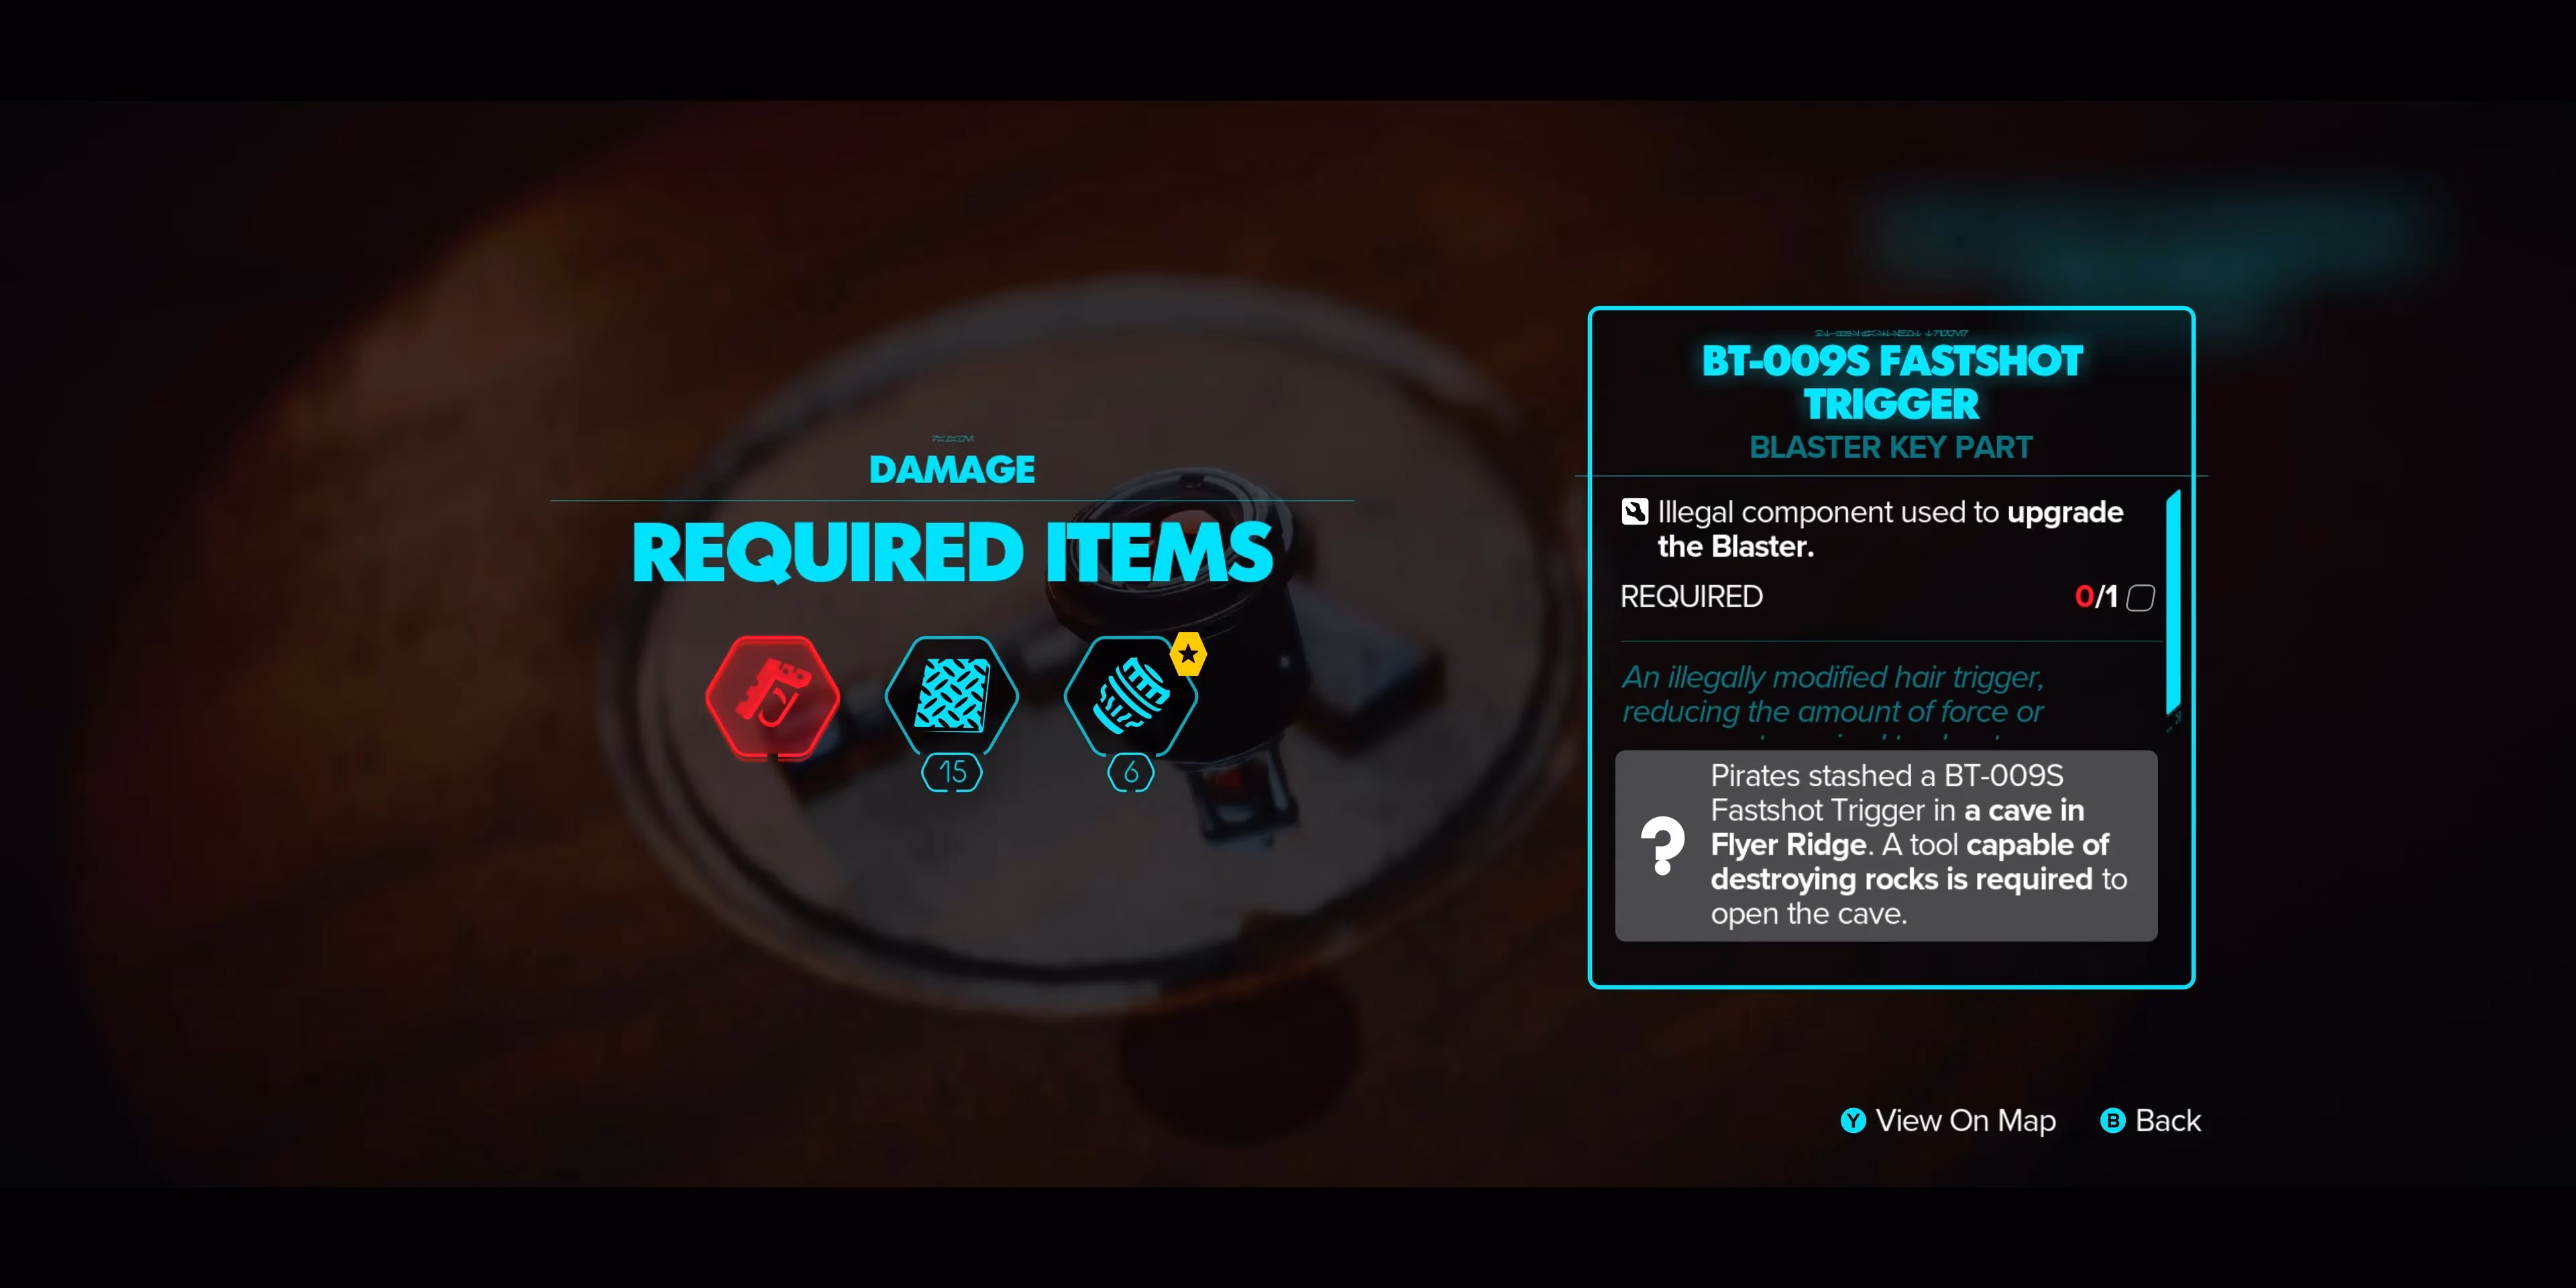
And then there are the key parts. The final upgrade for each configuration demands a unique key component, something you can’t just buy or stumble upon. These pieces are tied to specific quests, hidden locations, or boss encounters. My heart sank when I realized I’d need an “Overcharged Ion Capacitor” to max out the Ion module. The journal gave me a vague trail, leading me to an abandoned Separatist outpost on Toshara, crawling with old battle droids and trip mines. The hunt was worth it, though. When I finally slotted that capacitor into place, the Ion blasts could stun a group of enemies with a single charged shot. Game changer.
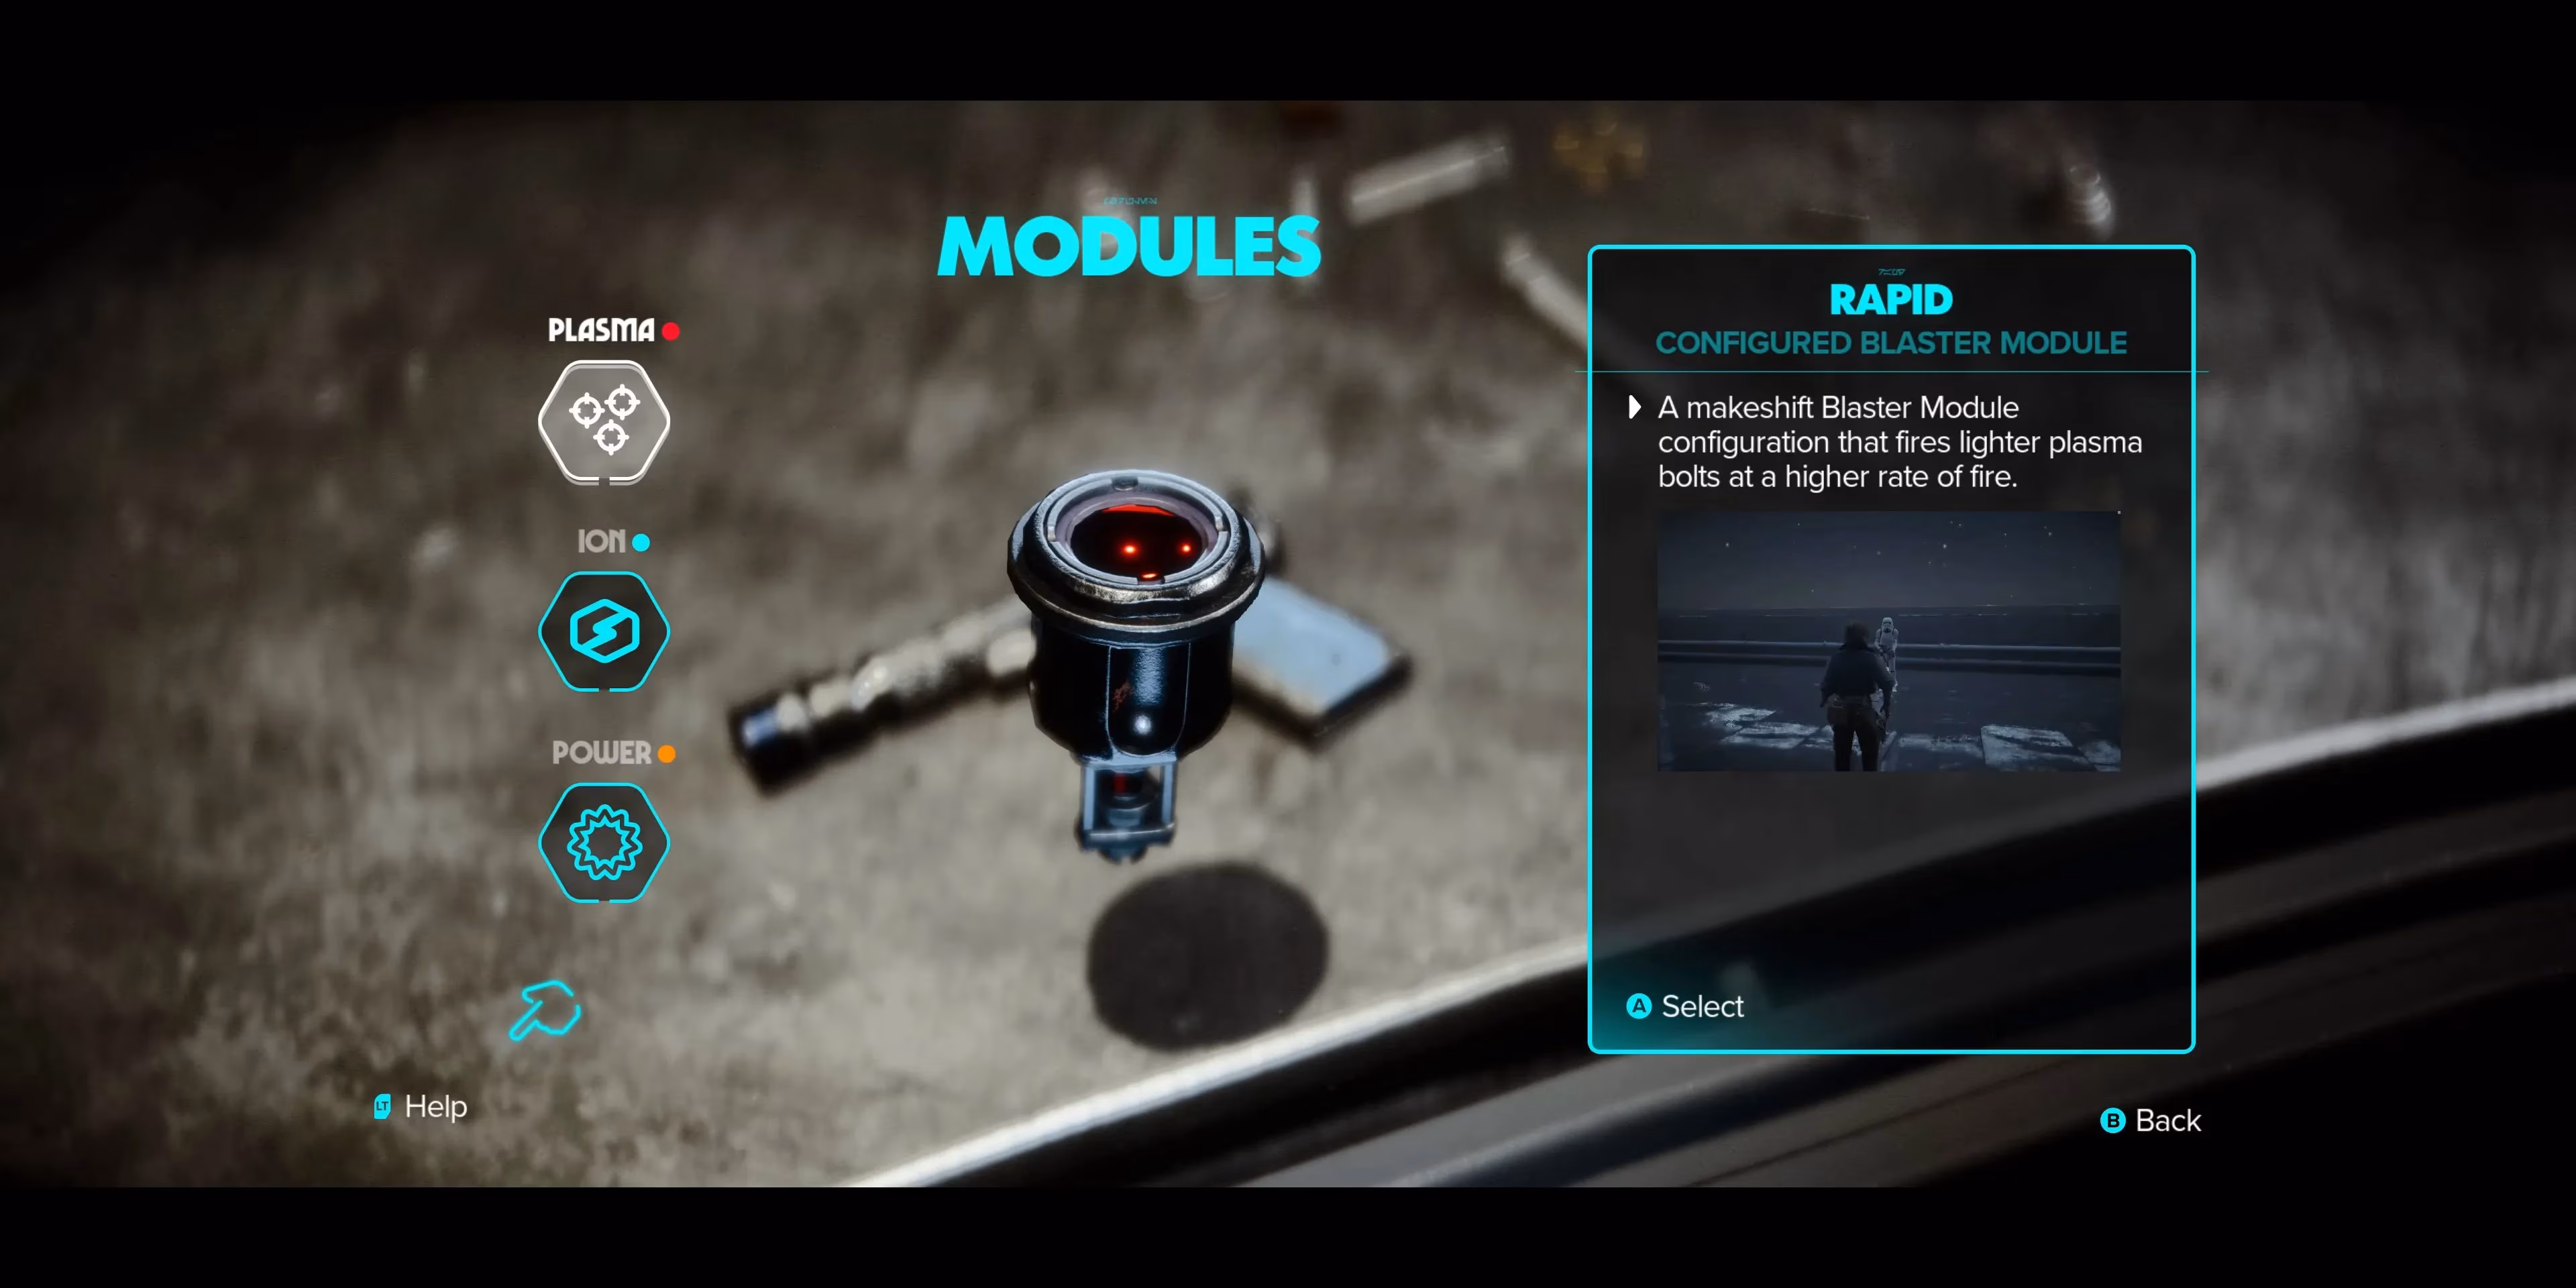
Let’s break down the modules. The Plasma module is your workhorse. Its first configuration, Standard, remains a reliable backup. The Heavy configuration (the expert-locked one) turns your blaster into a hand cannon that can stagger even the toughest opponents, but it consumes more ammo per shot and slows your fire rate. The third option, maybe something like Scatter (I’ll avoid exact names from memory), gives you a wide spread for close-quarters crowd control. My advice? Unlock Heavy as soon as you can, because when a Zerek Besh enforcer is charging at you with a vibro-ax, you want stopping power, not peppering.
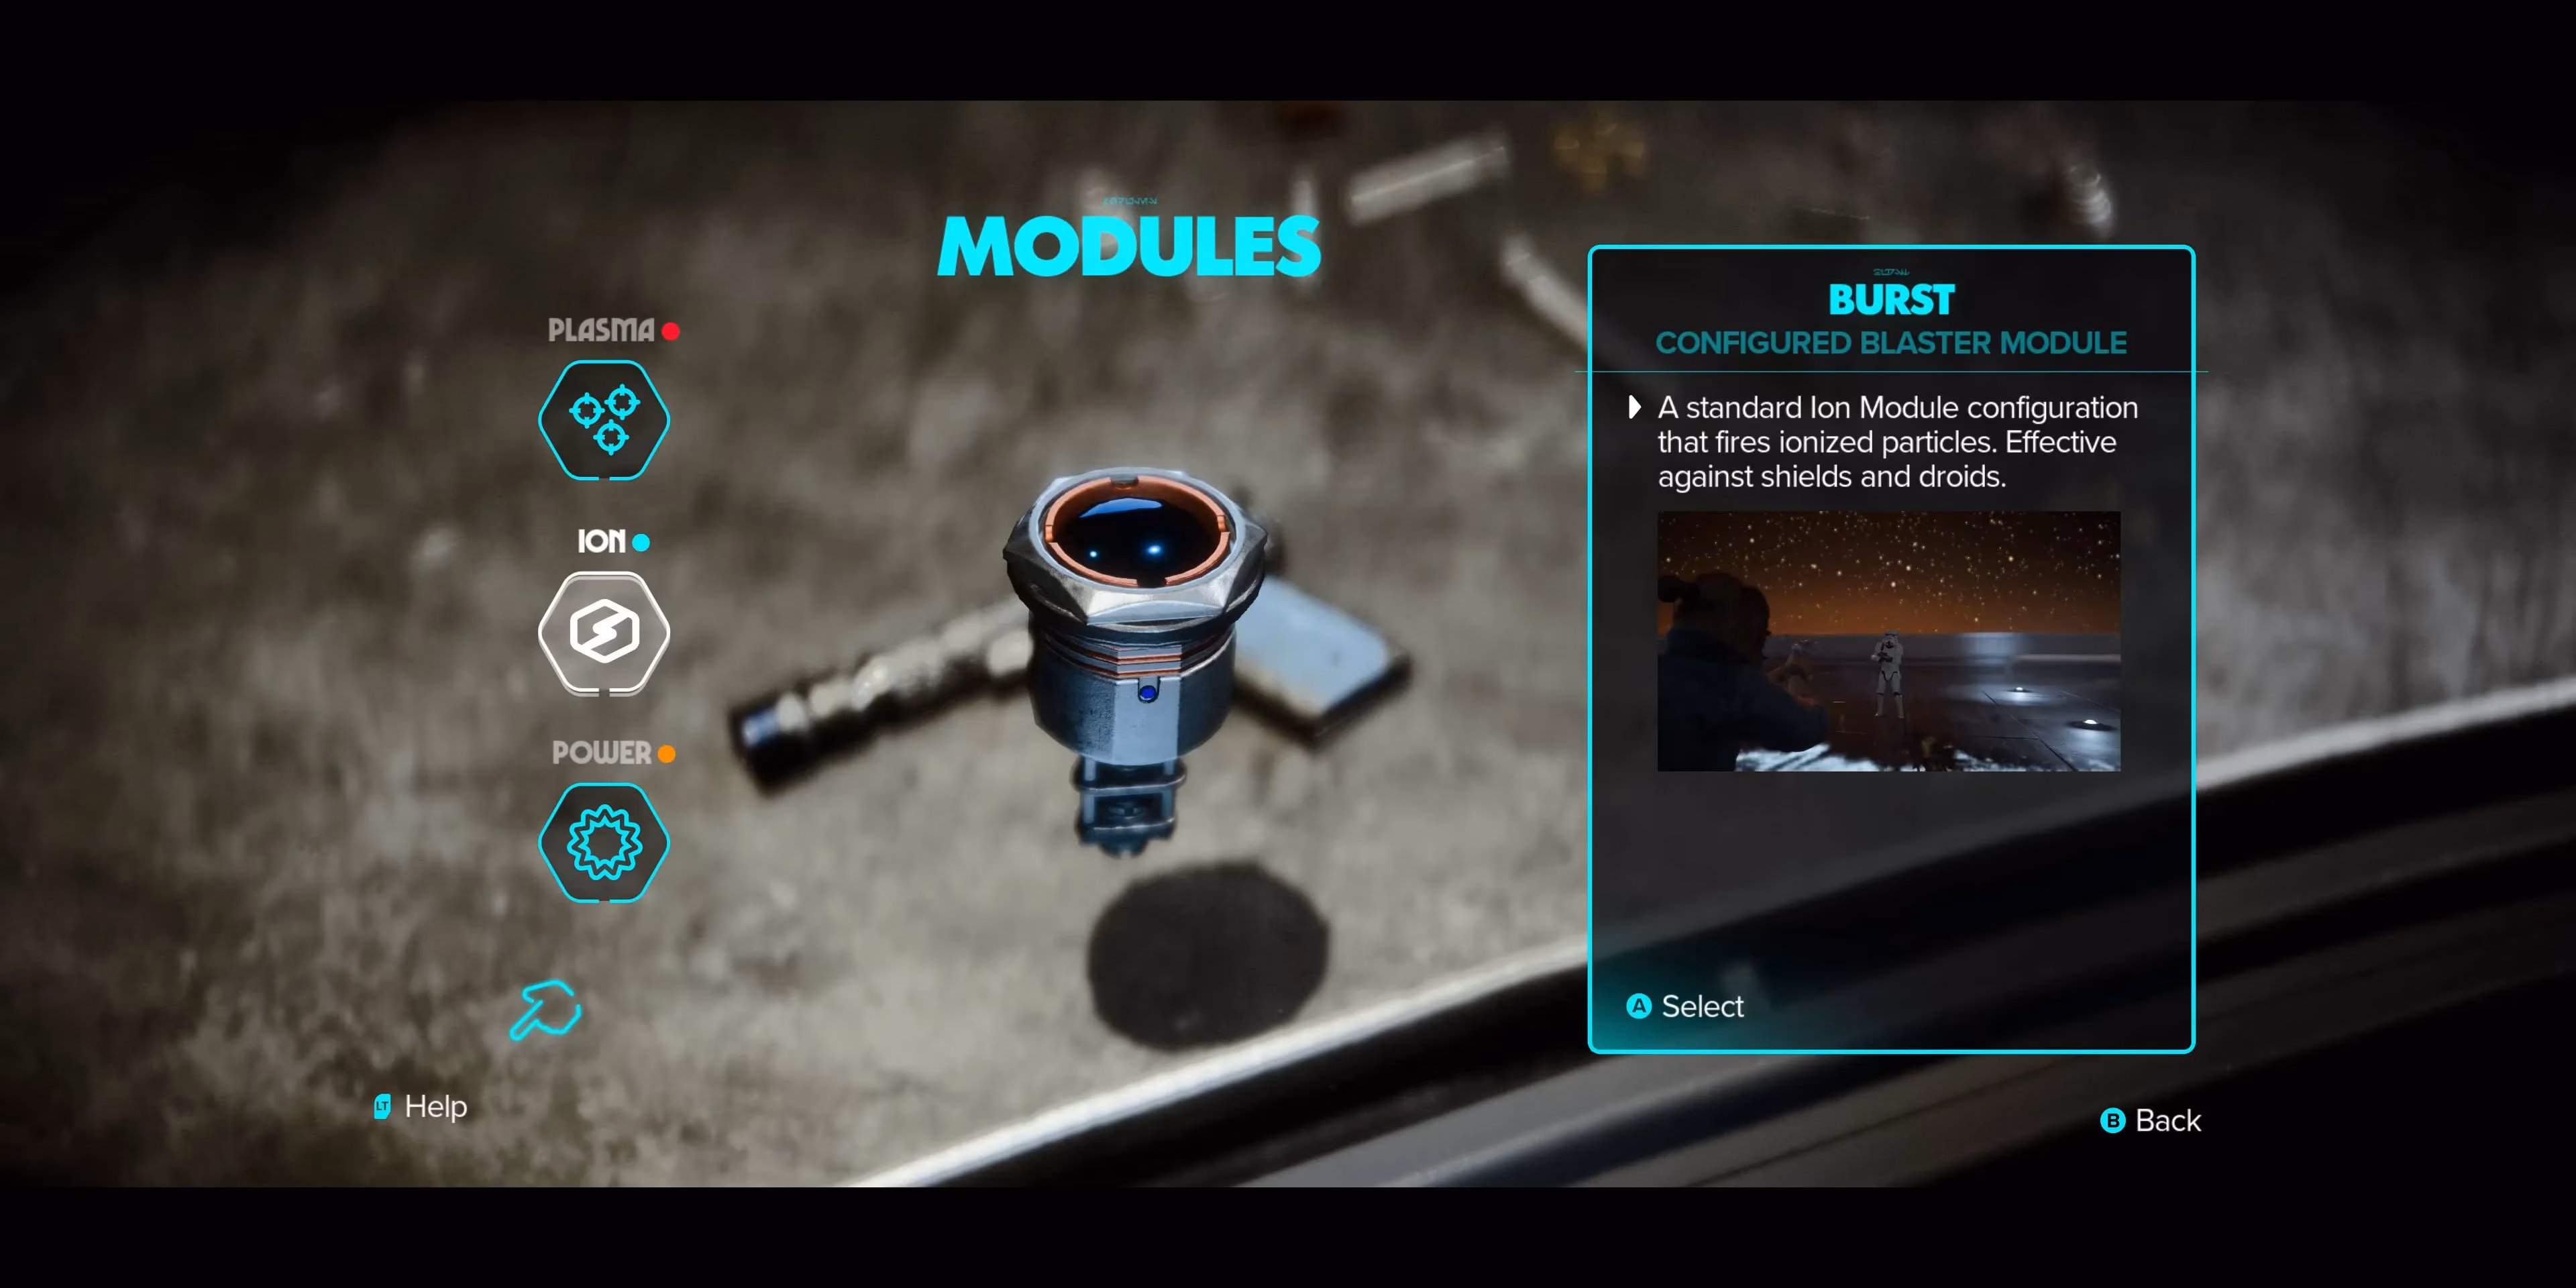
The Ion module is probably my favorite. Its configurations let you tailor your anti-shield capabilities. The base mode strips shields, but the upgraded versions can chain lightning between enemies, disable droids temporarily, or even overcharge generators from a distance. I used the Ion module almost as much as Plasma, especially in the later syndicate territories where everyone and their mother had a personal energy shield. Ever tried disarming an entire squad with a single well-aimed Ion burst while Nix distracts the last man? Pure outlaw poetry.
Finally, the Power module was the slow burner for me. It’s all about charged shots that deal massive damage and often have area effects. The configurations range from a precision bolt with penetration to a lobbed explosive shot that feels like a mini thermal detonator. The trade-off is charge time and ammo cost. I initially ignored it, relying on my trusty Plasma. But then I found myself pinned down by a squad of Imperial Death Troopers on Kijimi. The Power module’s explosive configuration turned the tide by blowing their cover—and them—to bits. After that, it became my “oh shi—sit” button on every mission.
So, what’s the optimal upgrade path? Honestly, there is no single answer. Your playstyle dictates your priorities. If you favor stealth and quick getaways, lean into the Ion module first; it’ll let you silently disable droids and security systems. If you’re a guns-blazing scoundrel like me, rush the Heavy Plasma configuration and the Power module’s area damage. Whatever you do, don’t neglect your faction rep. Building bridges with the syndicates isn’t just about story choices—it’s the only way to get those exclusive materials, and in turn, the upgrades that make Kay truly unstoppable.
In the end, upgrading Kay’s blaster transformed my entire experience. It stopped being a generic shooter and became a puzzle box of tools. Every upgrade I unlocked was a memory: the time I scavenged a part from a crashed TIE fighter, the moment I finally had enough credits to buy a rare greeblie from a Pyke contact, the first time I vaporized an entire squad with a charged Power shot. If you’re just starting your journey in 2026, don’t ignore the workbench. Tinker, hunt, and build that blaster into your own legend. After all, in a galaxy full of Sith, Jedi, and scheming syndicates, a scoundrel with a fully upgraded blaster is a force to be reckoned with.
This discussion is informed by data referenced from SteamDB, a widely used resource for tracking PC release activity, update cadence, and player-driven engagement signals—useful context when you’re planning a long-term upgrade grind like Kay Vess’s blaster modules. For a systems-heavy game loop where materials, faction-gated vendors, and key parts shape your build path, monitoring patch timing and version changes can help you decide when to revisit the workbench, re-check vendor inventories, or reassess which Plasma/Ion/Power configuration to prioritize as balancing tweaks roll out.