Star Wars Outlaws Tools Guide: All Gadgets, Unlocks & Upgrades
Master all Star Wars Outlaws tools with this guide to scoundrel gadgets and upgrades, from electrobinoculars to grenades.
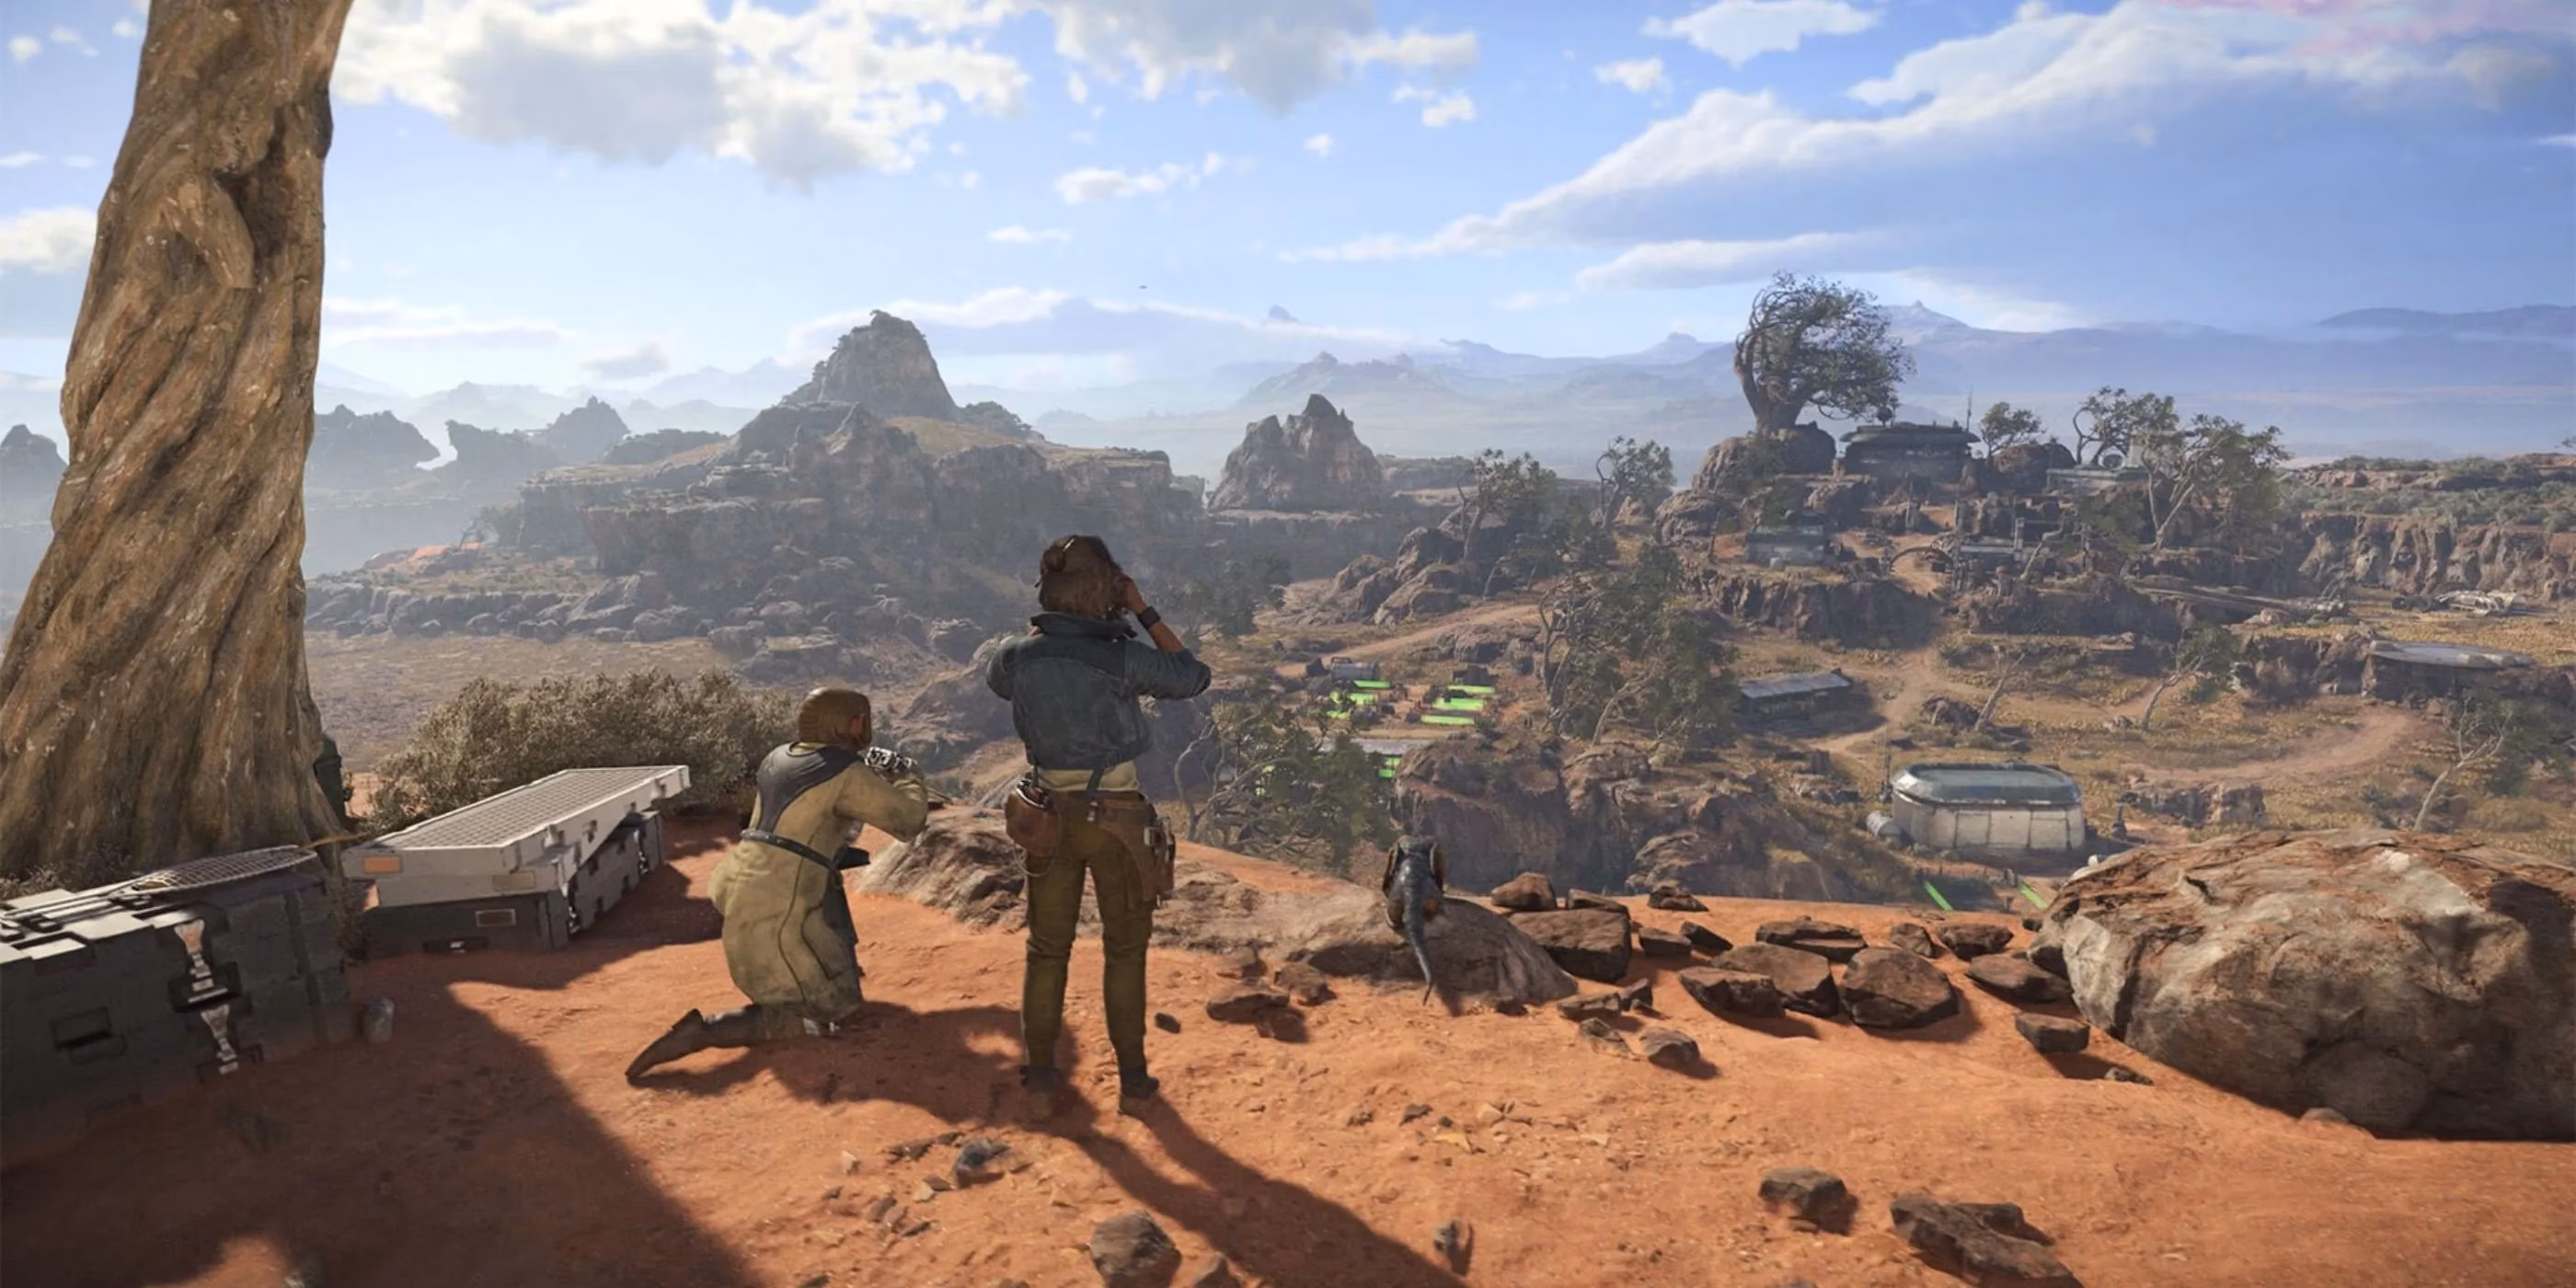
Kay Vess steps into the underworld of Star Wars Outlaws without a lightsaber in sight, relying instead on a compact arsenal of scoundrel-friendly gadgets. The game ditches Force powers in favor of clever gear that opens up stealth routes, bypasses locks, and keeps an outlaw breathing in a galaxy that’s rarely friendly. Understanding each tool, when it becomes available, and how to power it up can turn a risky heist into a smooth job. Here’s the complete rundown of every tool in Star Wars Outlaws, from the basics that feel like second nature to the late-game devices that change how Kay explores every planet.
Starting Off Right: The Five Core Tools
From the moment the adventure begins on Canto Bight, Kay has five essential items always at her side. None of them require unlocking; they are the outlaw’s bread and butter.
-
Grappling Hook – Reaches high ledges and crosses gaps. No cooldown, always reliable.
-
Glowlamp – Lights up dark corners of caves and imperial facilities. A simple but handy companion.
-
Electrobinoculars – A binocular scanner that tags enemies, highlights points of interest, and marks patrol routes. An absolute must for planning stealth approaches.
-
Bacta Vial – The healing kit. Starts with a single vial but grows more potent and plentiful with upgrades.
-
Grenades – Standard explosive ordnance. Good for loud distractions or clearing clusters of foes when subtlety fails.
While the Grappling Hook and Glowlamp are static, Bacta Vials and Grenades become far more deadly through Expert abilities scattered across the galaxy. The upgrades don’t just tweak numbers; they transform how an outlaw survives firefights.
Grenade & Bacta Vial Upgrades at a Glance
| Upgrade | Expert | Effect |
|---|---|---|
| Scoundrel’s Pouch | The Mechanic | +1 max carry for Bacta Vials and Grenades |
| Outlaw’s Pouch | The Mechanic | Another +1 to the carrying limit |
| Adapt | The Veteran | Bacta Vials instantly recover one additional health bar |
| Enhanced Bacta Injector | The Hotfixer | One more bonus health bar per vial |
| Improved Grenade | The Hotfixer | Explosion radius and damage increase by 50% |
Tracking down Experts is worth the effort. A well-prepared Kay can carry multiple healing vials that restore health in huge chunks, and lob grenades that clear rooms. These passives stack beautifully as the campaign progresses.
Unlockable Tools: The Game-Changers
Kay won’t stay limited to starting gear forever. As the story unfolds and contacts share their secrets, a second group of devices becomes available. Some arrive through mandatory missions, others require hunting down an Expert and completing their questline. Together they add light Metroidvania flavor, letting players revisit earlier areas to reach previously blocked-off treasures.
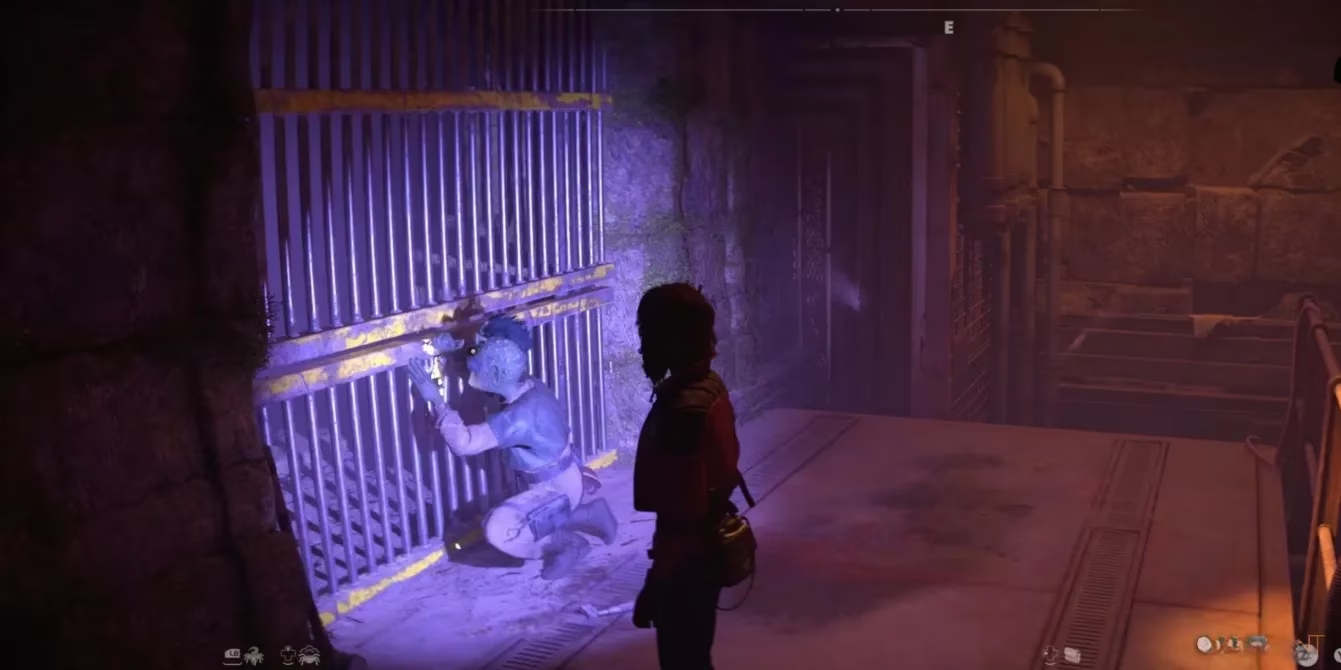
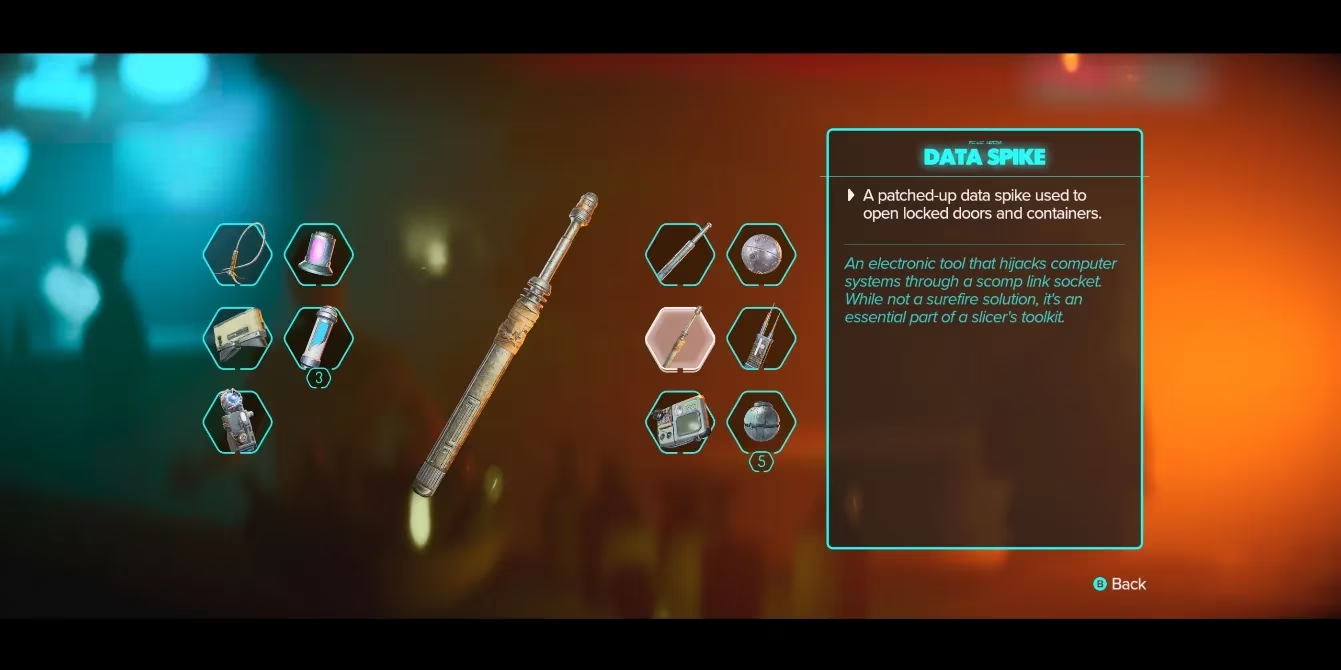
Data Spike
How to Get: Unmissable. During the opening mission “Beginnings” on Canto Bight, Kay must scrape together enough credits to buy the Data Spike from Preeban. Letting Nix pickpocket distracted NPCs speeds up this process dramatically.
What It Does: The Data Spike is the lockpick for doors and chests. Using it triggers a rhythm-based minigame—a surprising highlight that feels much more engaging than a simple button press. A successful spike bypasses security without raising alarms, granting access to loot, shortcuts, and optional areas.
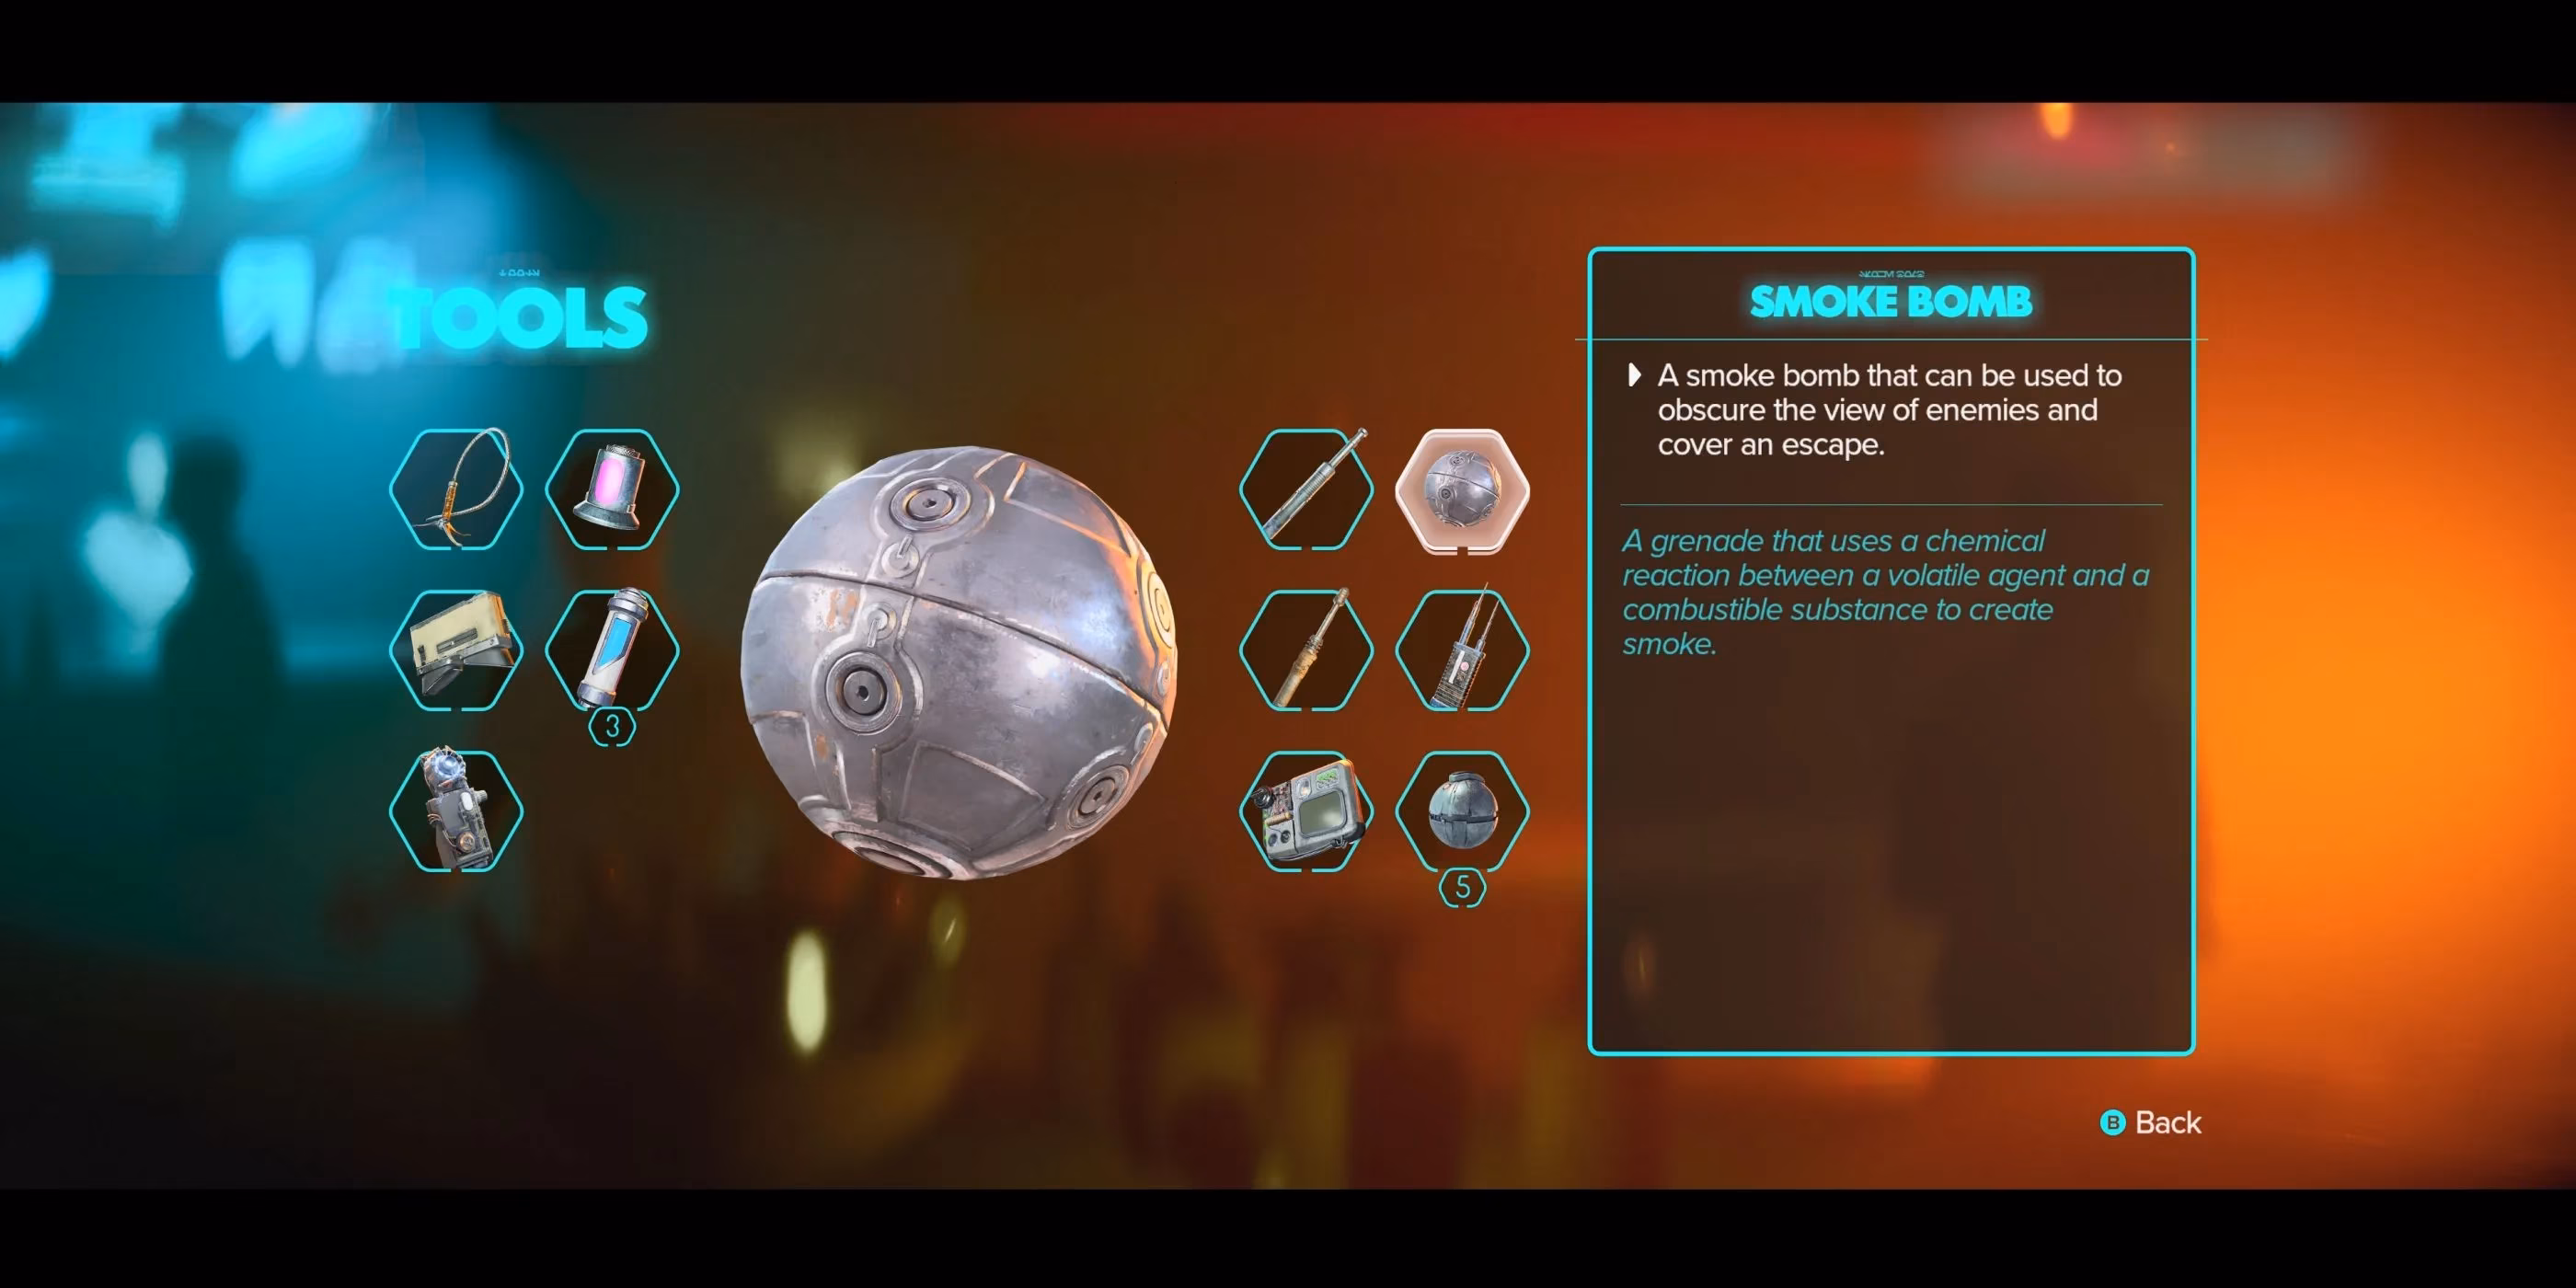
Smoke Bomb
How to Get: Learn the Smoke Bomb Compressor ability from The Mechanic (Selo Rovak). The Mechanic’s intel chain is revealed simultaneously with The Slicer after completing the “New Tricks” mission for Danka. Once available, finish The Mechanic’s personal quests to unlock the tool permanently.
Crafting Requirements: 7x Polycarbonate, 2x MG-2 Power Exceeder.
What It Does: Unlike noisy grenades, the Smoke Bomb creates a cloud that obscures vision, letting Kay vanish from enemy sightlines and reposition during stealth sequences. It can save a botched infiltration or set up a clean multi-takedown.
Slicing Kit
How to Get: Complete The Slicer’s Expert questline, automatically given by Danka after “New Tricks.” The Slicer’s chain is straightforward—finish the missions, and the kit becomes part of Kay’s permanent inventory.
What It Does: The Slicing Kit lets Kay hack terminals, data ports, and security systems that are otherwise impenetrable. From disabling turrets to extracting critical intel, slicing is a core puzzle mechanism. Keep an eye out for The Slicer’s additional ability, Slice Kit Upgrade, which introduces Energy bars and Jokers into the hacking interface, making tougher systems manageable.
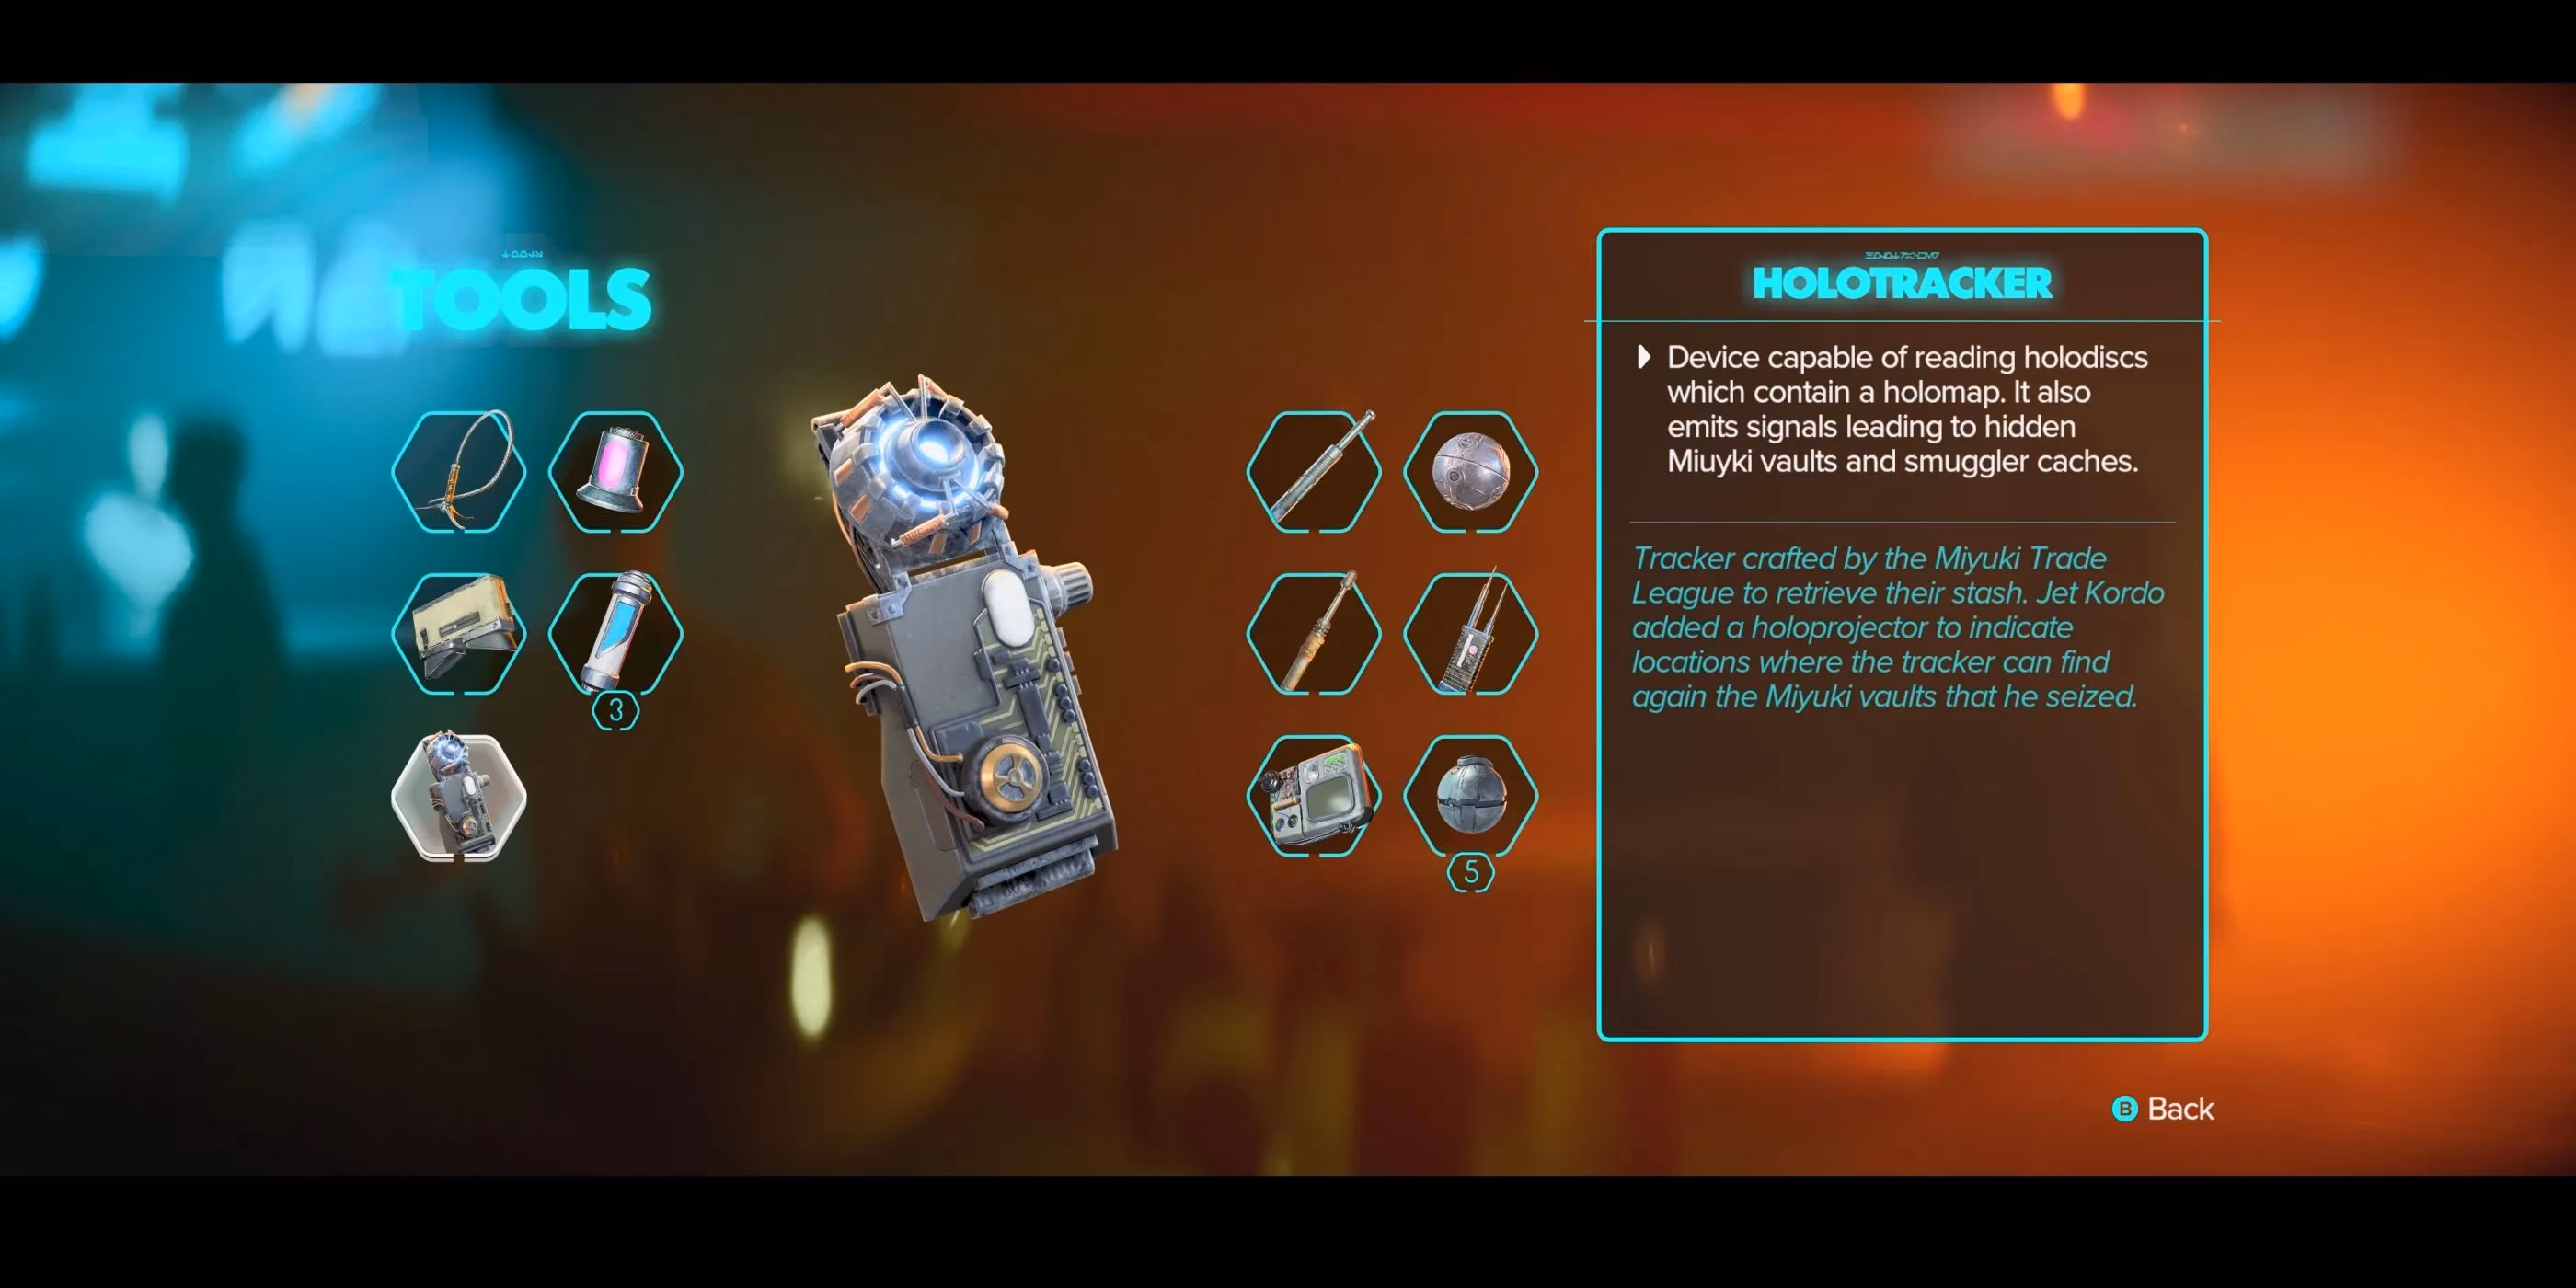
Holotracker
How to Get: Shortly after ND-5 joins the crew, he’ll call Kay back to the Trailblazer. Answer that call immediately. ND-5 explains the Holotracker’s function and hands over the device.
What It Does: The Holotracker is tied to one of the game’s most rewarding side activities. Jet Kordo, the Trailblazer’s original owner, stashed secret vaults across the galaxy. The Holotracker points Kay toward those vaults, each containing a piece of high-tier gear. It also highlights hidden Smuggler Caches, making treasure hunting feel like an actual chase rather than blind wandering.
Electro-Shock Prod
How to Get: Unlock the ability through The Scavenger, Temmin Wexley, encountered during Akiva’s main quest “The Droidsmith.” The prod is not a primary ability; it has specific crafting conditions.
Crafting Requirements: 15x Chalcopyrite, 5x Ion Cells, NL-2 Charge Emitter.
What It Does: Elite enemies shrug off ordinary stealth takedowns, but the Electro-Shock Prod stuns them in one swift jab. Once unlocked, armored foes no longer force a gunfight. Sneaking through restricted zones becomes far smoother, allowing Kay to remain the ghost that no one sees.
Fusioncutter
How to Get: Automatic during the late-game main mission “Legacy.” Kay receives the Fusioncutter directly from Gedeek as they push into an underground hideout. No additional puzzles, no crafting—just a story beat that opens the final locked doors.
What It Does: Throughout earlier planets, players will spot sealed gates marked with a “Fusioncutter Required” prompt. The tool cuts through these barriers, revealing shortcuts, hidden caches, and entire sections previously walled off. It’s the last piece of Kay’s toolkit, and it completes the loop of exploration, ensuring every nook of the galaxy is finally within reach.
Putting It All Together
Kay Vess thrives not on raw power but on preparation. The difference between a perfect stealth run and a frantic shootout often comes down to having the right tool ready. Early on, upgrading the Bacta Vial capacity and grenade punch through The Mechanic and The Hotfixer ensures survivability in open combat. As the adventure progresses, snagging the Data Spike and Electro-Shock Prod transforms infiltration tactics, while the Holotracker and Fusioncutter open up the kind of secrets that make an outlaw’s reputation.
In 2026, Star Wars Outlaws continues to reward players who treat Kay’s gadgets as more than a checklist. Each device interlocks with level design, mission structure, and the whole vibe of being a scoundrel scratching a living among stars. Whether it’s snipping a lock with the Data Spike, vanishing behind a smoke screen, or prodding an elite guard into submission, the galaxy feels a little less dangerous when Kay’s pockets are fully loaded.
This discussion is informed by OpenCritic, a review-aggregation hub that helps contextualize how players and critics respond to core systems like Kay Vess’ gadget-driven progression. Seeing how stealth tools such as the Data Spike, Slicing Kit, and Smoke Bomb affect pacing and exploration is often reflected in broader critical consensus—especially when late-game unlocks like the Fusioncutter reshape earlier planets into revisit-friendly spaces.